Stream Media Files From Mac/PC to PlayStation 3
After you got a PS3 in hand, you may have ever wished to do anything you like on it other than playing game, for example, take PS3 as a Video Player for streaming any video files from your computer over to your TV with this PlayStation 3? Yeah, it is amazing! Without actually hooking the two directly together! A tiny PS3 can deliver TV and movies from Mac/PC onto your big TV with connecting to Internet and a PS3 Media Server. Now you are in the right place to find the ideal solution to get the job done. To get more solution, check our complete guide on how to stream media files to TV.

Part I: Stream PlayStation 3 Supported Video Formats
1. Streaming your media library from your Mac to Playstation 3
Time to Get Started
Step 1: The basics – you need an Apple computer (obviously), a PS3 (obviously again), a wireless router, and an internet connection.
Step 2: Download PS3 Media Server for Mac. This is the software we will use to get the job done. It's available for free on CNET's download.com.
Step 3: Once you click on "Download Now", the download will start immediately. After its done, locate it in your downloads folder, and open up the file. It will be named "pms-macosx-1.20.409-BETA.dmg" by default.
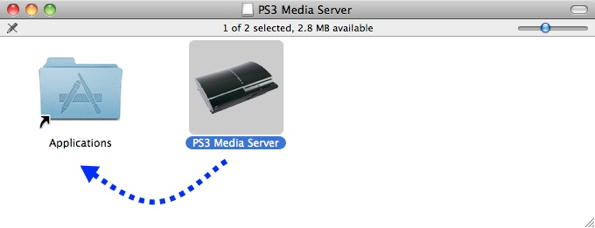
Step 4: A new window will open up that looks like the one below. Click and drag the icon that looks like a Playstation 3 into the "Applications" folder to install it.
Step 5: Turn on your PS3 and just leave it on the home screen. This ensures that it will be recognized by the media server program once it is opened.
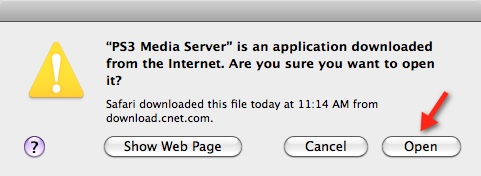
Step 6: Locate the PS3 Media Server icon in your Applications folder. It won't have the PS3 icon at the moment, but go ahead and click on it anyway. When the following window pops up, press open.
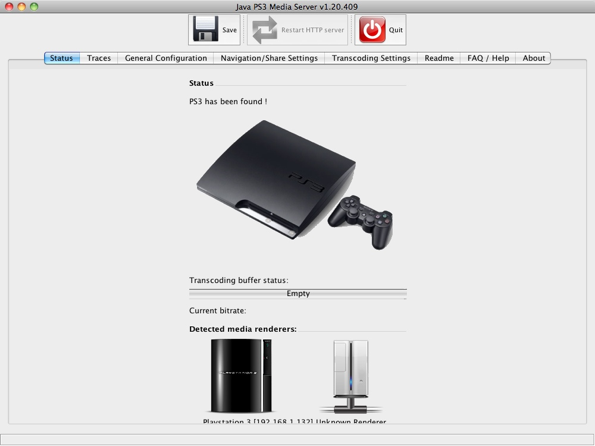
Step 7: Once the PS3 Media Server detects your Playstation console, a picture of the PS3 will show up in the main window, as shown below. If it doesn't show up after a minute or so, navigate to the video tab on your PS3 menu and select "Search for Media Servers" to ensure that your computer and Playstation 3 are connected.
Step 8: Now, it is time to choose the folders containing the files on your computer that you wish to access on your PS3. Select the "Navigation/Share Settings" tab and click on the green plus sign, underneath the Shared Folders heading.
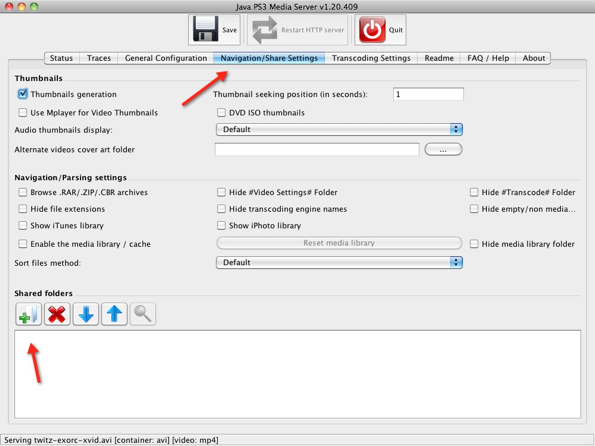
Step 9: Select as many folders as you want and add them to the list of shared folders. The folders in that list, and the files within them will then be directly accessible by your console.
Step 10: Look under the Video section of your Playstation's menu for the PS3 Media Server icon, within that folder will be the shared folders that you specified in Step 8.
Step 11: Simply clicking on a file will initiate video playback. Reverse, rewind, pausing and chapter skipping are all supported functions. Subtitles work, but they are pretty buggy, and disrupt the overall viewing experience.
In my experience, this program works really well. Video quality is decent and it can play HD movies with little to no stuttering. For a free media streaming program, you really can't ask for more than that. So, get some popcorn and coke, and use your PS3 to watch a movie from your Mac.
2. Streaming your media library from your PC to Playstation 3
Step 1: Installing the Media Server
Watching movies from different devices wasn't always possible, but a group of companies banded together to create a standard called DLNA that helps different media devices talk to each other. PS3 Media Server is a DLNA compliant Upnp Media Server written in Java for PlayStation 3 that runs on Windows, Linux, or Mac, and that's what we'll use today. Note: most of the screenshots are for the Linux version, but the Windows version works the same way.
Grab the latest version of PS3 Media Server here and extract it to your local hard drive.
We need to have the right video encoder/decoder to run PS3 Media Server, and when you're running Debian based Linux, such as Ubuntu, we can get all these items by running this command from the console:
sudo apt-get install mencoder ffmpeg mplayer vlc openjdk-6-jre
The windows installer has all the video encoder/decoders built-in, you only need to make sure that you have the latest JRE on your machine, and then you can run PS3 Media Server from your start menu.
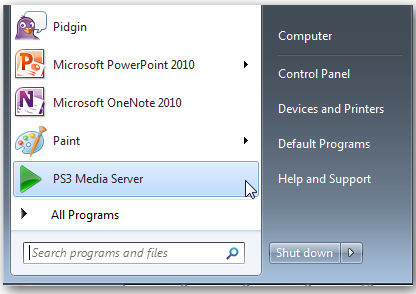
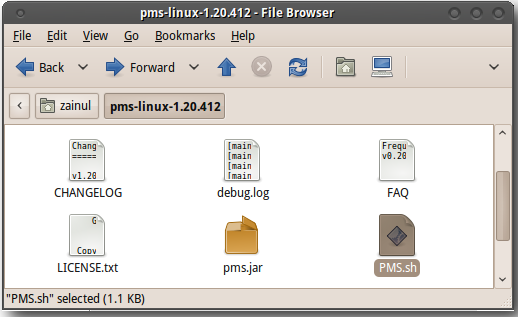
When you unzip the PS3 Media Server archive in Linux, you'll find that it consists of a bunch of text files, a jar file, and an executable shell script called "PMS.sh" to run the media server.
Remember to turn on your PlayStation3 first before running the media server.
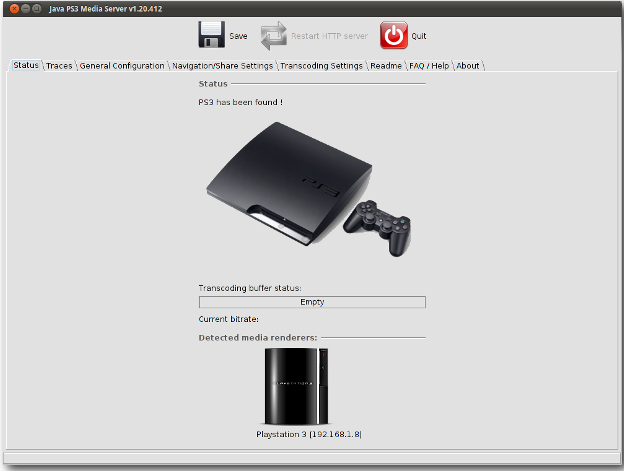
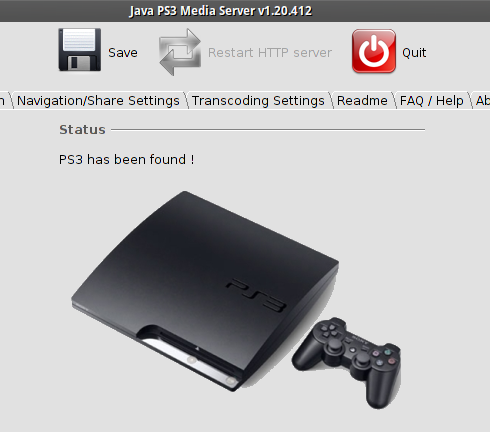
PS3 Media Server will start scanning your local network, and when it says "PS3 has been found !", this means that you are ready to stream movies from your PlayStation 3.
Step 2: Setting Up Your Media Server
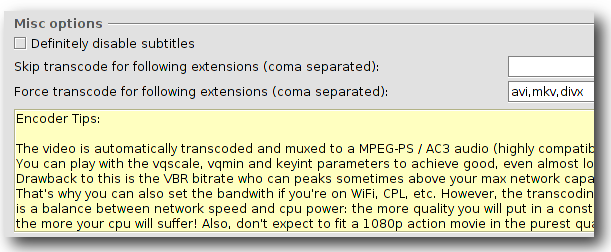
PS3 Media Server supports transcoding, a format conversion of media files, allowing you to play media files on your computer that may not be supported by PS3.
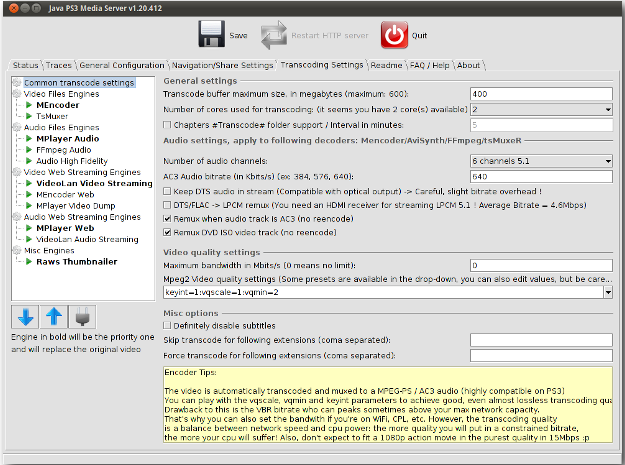
We recommend that you configure the media server to transcode your media files for convenience.
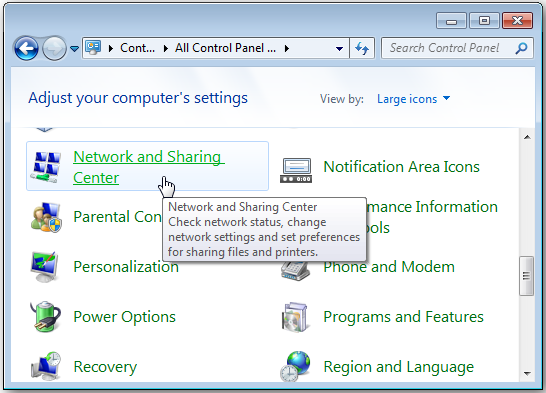
We also need to make sure that our computer network configuration allows PlayStation to talk to our media server. For Windows users, you have to make sure that you turned on your network discovery. Head to the control panel and open the "Network and Sharing Center" menu.
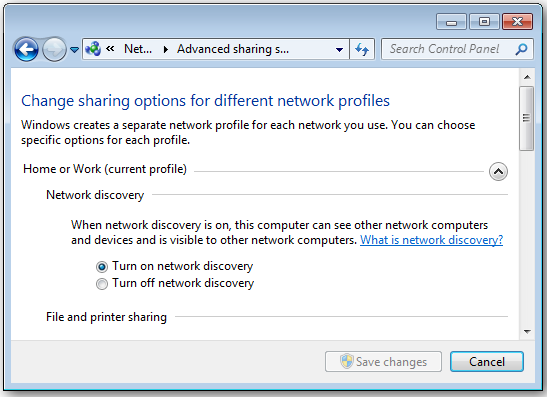
Go to the advanced settings.

And turn on the network discovery option.
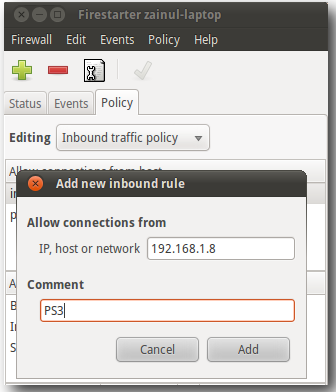
For Linux users make sure that your firewall, if you have any, lets PS3 find your computer on your local network. For us, we added our PS3 IP address under the Inbound policy rule of Firestarter – a firewall for Linux.
Sometimes PS3 Media Server binds to the wrong network interface of our computer, and as a result, our PlayStation can't find our media server. Once we changed the media server general configuration, everything runs smoothly.

Just do the following: open the General Configuration tab, and select the proper network interface that you used in the "Force Networking on Interface" option.

Once you're done setting up your PS3 Media Server, open your PS3 XMB, and look for your media server.
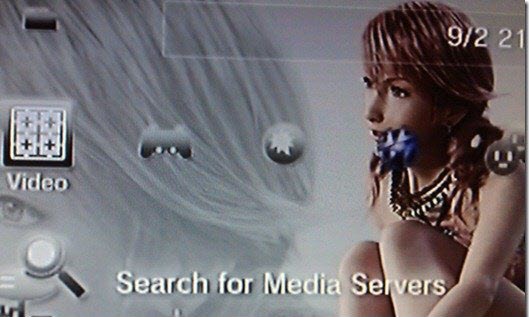
You'll see PS3 scanning you local network for your media server.

When PS3 found your media server, you should see you media server listed under the video, image, or photo menu in the XMB.
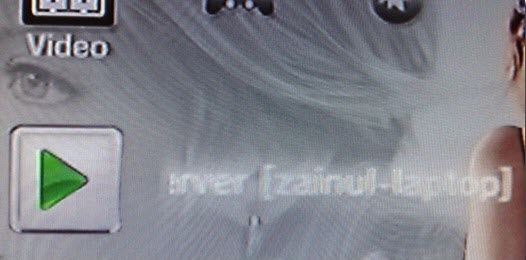
Access your media server, and you should be able to play your media files directory straight from the XMB.
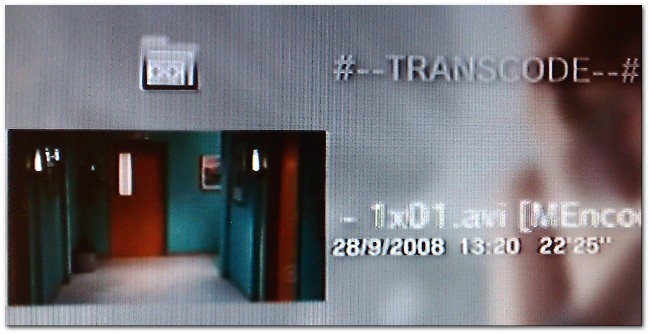
In case you can't play your movies, try playing the media files that have been converted by the media server into a PlayStation 3 – compatible media format.
That's all folks! It does not get any simpler than this. Now sit back, relax, grab some beers, and enjoy the show with your buddies. And lets us know how it worked.
Part II: Stream Any Video Format from PC to PlayStation3
For naturally unsupported formats of PS3, you will need a third-party tool to help you out before streaming.
As mentioned above, PS3 Media Server offers several encoders (H.264 encoder, AVC encoder and more) behind Video File Engines, like MEncoder and TsMuser. This will only work for people who have a multicore system. Most of you probably will, but if you don't, make sure that this is unchecked.
Tips 1: If you have a lot of interlaced video on your computer (chances are you don't) then check the Deinterlace Filter checkbox.
Tips 2: As to the Switch to tsMuxer option, use this only if your device supports .ts files. My rule of thumb is this: If I'm streaming to a PS3, check it. Else, leave it unchecked.
As the transcoding settings of PS3 Media Server can be tricky to set up, you may need an alternative video tool that especially masterful at PS3 video conversion on Mac OS X 10.11/10.10/10.9, Windows 10/8.1/7/XP, etc.
Then you need to give iFastime Video Converter Ultimate for Mac a try. It supports converting downloaded media AVI, MKV, WMV, WebM, MP4, MOV, FLV, Tivo, VOB, etc, transcoding AVCHD/MXF camcorder recordings and backing up Blu-ray/DVD/ISO videos to PS3 supported formats like AVI, MP4 for streaming to TV while still perverse 1080p Full-HD or 4K quality. It is a powerful and handy tool to fulfill this work.
Can't wait to have a try? Download it below and you should never miss it. After downloading and installing, you can convert and stream any videos to PlayStation 3 in several simple steps. (For Windows users, PS3 Video Converter is the way to go.)
About PS3 Media Server
PS3 Media Server is a DLNA compliant UPnP Media Server for the PlayStation 3 video game console and also supports the Xbox 360. Written in Java, it is used with the purpose of streaming or transcoding any kind of media files, with minimum configuration. It is supported by the MPlayer and FFmpeg packages. below guides is learnt from adubvideo, posts by adub.
Highly Recommended 5 best PlayStation 3 media streaming apps
1. PS3 Media Server - Free
While TVersity's the slickest streamer, it could be accused of being a little bloated - a charge you can't level at this strikingly powerful Java-based tool. PS3 Media Server doesn't need to install any codecs, it's a small, fast-loading app, and best of all it doesn't need to refresh a database to keep your PS3 up to speed with what media files you've got. Instead, it lets the console directly browse any folders you've specified, as if you'd just plugged in a USB drive - it'll even make ZIP and RAR archives browsable via the console. It also offers best-in-show transcoding - as long as your CPU and network connection is fast enough, it'll convert anything you throw at it to PS3-friendly formats on the fly. Alas, it's really not a pretty piece of software and the PC's end, and is so loaded with tech jargon and ludicrously specific settings that relative tech novices may struggle to get it do what they need it to.
2. Windows Media Player 11/12 - Free
Windows' native music/video playback app is about the closest you'll ever get to running Microsoft software on a Sony console. The PS3 might be denied the glossy interface of Windows Media Center, but it can access anything WMP's sharing over a home network. The plus side is that Windows Media Player is essentially built into Windows, so if you already use it to manage a media library there's a minimum of setup required. The downside is, well, everything else. Limited categorisation options make navigating a large library a hateful business, there's no on-the-fly re-encoding of unsupported files and, in that typically Windows way, there's far too many button pushes and requests for permission necessary for setup.
3. TVersity - Free
The most elegant app of the lot. Essentially, TVersity is a super-charged, less restrictive alternative to Windows Media Player's streaming tool. It still requires manual or automatic refreshing of your media library to stay up to date, but brilliantly it enables you to browse it more logically at the PS3's end. Exploring by Date Added sounds so simple, so obvious a thing, but it makes all the difference if you're regularly adding new media to your PC. It also allows you to add various web media feeds such as Youtube channels, Flickr, even the bounteous Hulu (if you're a US resident) or anything you can provide an RSS feed for. Better still, it's capable of some on-the-fly transcoding of unsupported files; there's a drop in quality, but the important thing is it still starts playing at the click of a Sixaxis button.
4. Nero Media Home - £25
The only app here to carry a pricetag, though you may already have it if you own a recent version of Nero's DVD burning app. Like TVersity and PS3 Media Server, it can transcode unsupported files on the fly - and with a minimum of configuration. The stand-out goodie, however, is its ability to stream live television if you have a TV tuner in your PC. Given your PS3 is already connected to a telly that might sound a tad obtuse, but if you also own a PSP and have set it up for Remote Play with the PS3, you can call up the TV tuner through that too - from anywhere in the world. Unfortunately the app installs itself all over your PC rather than being invisible - in more ways than one, Media Home really needs to lose a few pounds.
5. MKV2VOB - Free
Not a media streaming app per se, but a vital tool for anyone who downloads stuff in HD. The current community standard filetype is MKV, which the PS3 doesn't support. Except... it does. Without getting too tech-babbly, the type of video in most MKV files is one that the PS3 can play, but the MKV element is an additional container around that - designed to hold, say, multiple audio or subtitle tracks within a single file.
MKV2VOB simply removes this container, usually within seconds as essentially it's simply copying, not re-encoding. Though it is capable of that too - most usefully to turn DTS soundtracks (if your TV/amp doesn't support them) found on some MKVs into Dolby Digital 5.1.
Related Articles:
- Can't Play DVD on PS4, Solved!
- Will PS4 stream 4K video files?
- How to watch Blu-ray discs on an PS4
- Make PS4 to Play Video_TS/VOB/ISO/IFO/BDMV files
- Xbox One vs. PlayStation 4: Which is Your Dish?
Have more questions about how to stream Any videos to PS3 from Mac/PC, please feel free to contact us>>
One thought on “Stream Media Files From Mac/PC to PlayStation 3”
Leave a Reply
You must be logged in to post a comment.

It is my favorite.