Sony FS7 4K XAVC-L Support in DaVinci Resolve 11/12
With the most advanced color corrector, DaVinci Resolve can help you creating beautiful videos with Hollywood style just as other professional directors do. While editing with DaVinci Resolve, many folks have high wishes for Resolve 11/12 to add support for 4K XAVC-Long GOP from Sony FS7. If you're in such a situation, you can read on to learn more. In this article, you will learn the reason why Resolve 11/12 has no ability to edit XAVC-L from FS7 and how to get a smooth Sony FS7 4K XAVC-L and DaVinci Resolve workflow.
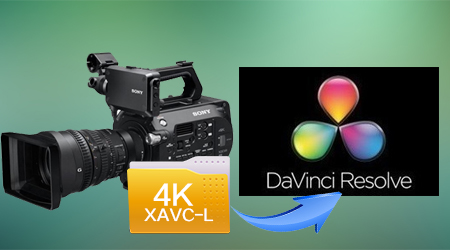
For those not familiar, XAVC L is Sony's professional MXF-wrapped long GOP codec, 10-bit 4:2:2 (including existing UHD and 4K as of firmware update 2.0). I've been testing the Sony FS7 which shoots XAVC L. Resolve will read the MXF files but will not playback properly since it doesn't recognize the gop structure.
Granted, up to now, DaVinci Resolve 11.3 supports Sony XAVC Intra encoding without much problem, but in fact, editing Sony FS7 4K XAVC-L at 240 Mbps in Resolve requires 1/4th the cost in memory and storage. Thankfully you probably don't have to buy a new computer... but you'd better to convert such high definition 4K XAVC-Long GOP videos from Sony FS7 to DaVinci Resolve using DNxHD.mov (1080p) as primary delivery format to solve the incompatible trouble.
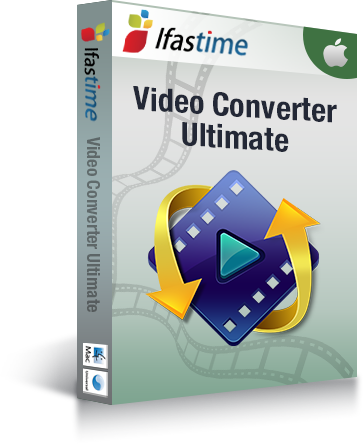
iFastime Video Converter Ultimate for Mac is the versatile 4K XAVC-L to DaVinci Resolve transcoding software on Mac, the one used here can meet your demands with its simple interface, but rich functions:
- Transcode Sony FS7 4K XAVC-L files to DNxHD for DaVinci Resolve with keeping video quality.
- Provide simple editing function like trimming, cropping, adding special effect and inserting subtitles.
- Compress 4k videos to 1080p files with smaller size for smoothly editing
- Allow you to set the video/audio output parameters to get customized video effect.
- Convert 4K files to editable footage for FCP, FCE, iMovie, Avid Studio, Adobe Premiere, After Effects, iPhoto, Kdenlive, Keynote, etc.
- Rewrap 4K videos for playback on iPhone (6S/6S Plus), iPad (Pro/Mini 4), Galaxy Note (5), Roku (4), Apple TV (4), etc.
All these are reasons why this 4K XAVC-L video Converter for Mac worth a try. Thus, it is highly recommended on many forums. So, what does the workflow look like?
Free Download iFastime Video Converter Ultimate for Mac:
Detailed instruction on converting Sony FS7 4K XAVC-L to DaVinci Resolve
Step 1: Add Sony FS7 4K XAVC-L files to the program
Copy the Sony FS7 4K XAVC-L files to your hard drive. Launch the 4K XAVC-L video converter. Click "Add video" icon to load 4K XAVC-Long GOP video files or directly drag & drop the files into file list.
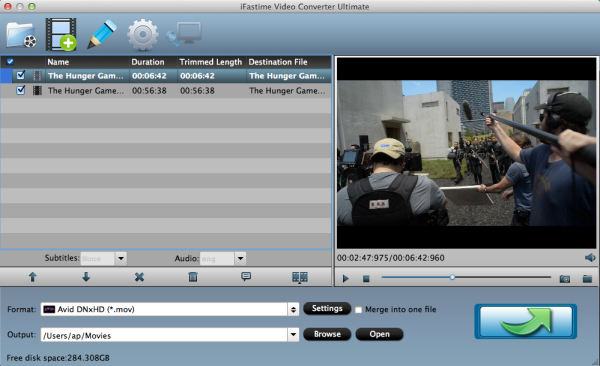
Step 2: Choose Avid DNxHD (*.mov) as output format for DaVinci Resolve
Click on the "Format" bar and choose a best editable format for editing in DaVinci Resolve. Here "Avid Media Composer > Avid DNxHD(*.mov)" is highly recommended as output format. Of course, you can also click "Common Video" > "MOV - QuickTime (*.MOV)" as the target format.
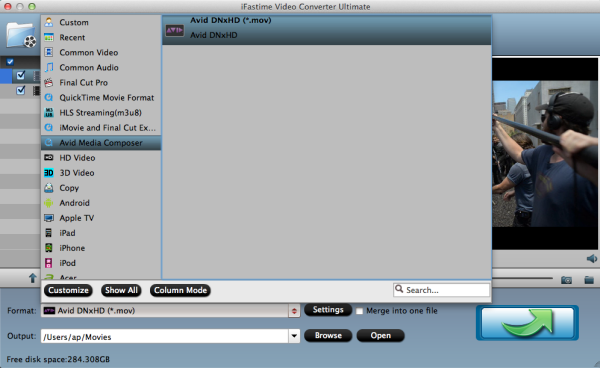
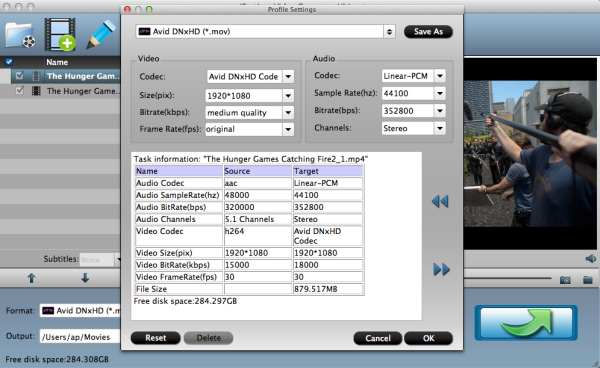
Step 3: Profile Settings
In case the default settings do not fit your requirement, you can click "Settings" button and enter "Profile Settings" panel to adjust video size, bit rate, frame rate, sample rate and audio channels.
Note: You’d better downscale Sony FS7 4K XAVC-L to 1080p for importing and editing in DaVinci Resolve easily.
Step 4: Start Sony FS7 4K XAVC-L to DaVinci Resolve conversion on Mac OS X
Hit the "Start conversion" button of the best 4K XAVC L video Converter; it will start converting Sony FS7 4K XAVC Long GOP files for importing to DaVinci Resolve 11/12 immediately. It's amazing, huh? Just follow the above guide to get your smooth Sony FS7 4K XAVC-L and DaVinci Resolve workflow and go on your movie director experience.
Video Tutorial - Sony FS7 4K XAVC-L and DaVinci Resolve Workflow
Have more questions about how to get Sony FS7 4K XAVC-L and DaVinci Resolve Workflow, please feel free to contact us>>
Related Articles
One thought on “Sony FS7 4K XAVC-L Support in DaVinci Resolve 11/12”
Leave a Reply
You must be logged in to post a comment.
It also comes with basic video editing features, including Trim, Crop, Effect, Watermark and Subtitle. You can simply get the editing work done before conversion. No need to use DaVinci Resolve.