Stream and Play Videos on Your PS4 from PC/Mac
Jan 25, 2016 06:51 pm / Posted by Charles Brown
If you have a PS4 gaming console in the household, you may be pleased to discover that it's really quite easy to stream video and audio from a local Windows PC or Mac to play directly on the PS4. Here offers you 3 nice methods to play movies on PS4 from PC/Mac.
Part 1: Stream PS4 Supported Video Formats
Method 1: Via USB
You can use a USB stick to copy and play your favourite videos on PS4, and here's how
- Your USB stick needs to be in FAT32 or exFAT. This means that 4GB+ files may be an issue so cut them down to size if need be.
- Windows 7/8 don't make it easy to format your drives to FAT32, so you will have to download a third party piece of software here: FAT32Format
- FAT32Format will allow you to format the drive very quickly to FAT32.
- If this still doesn't work, you may have to go for a full format.
a. Go to Start Menu -> Type CMD in Search Programs and Files, right-click to run as admin [Windows 7]
b. Right-click Start button -> Select Command Prompt (Admin) [Windows 8/8.1]
c. Type "format i: /FS:FAT32" without the quotes, where i is replaced with whatever the USB drive is, be sure to get the right drive.
d. Press enter and it should start formatting, but it will take a few hours depending on the size of the drive. - Create a folder on the USB stick, and place all videos into this folder. It doesn't need to be called PS4, just needs to be a folder, else you won't see anything.
- Audio needs to be in a folder called Music.
- You can now go into the Media Player and select the USB stick from the list to watch your videos.
Method 2. Using Media Server and PS4 Media Player App
PS4 Media Player is not only capable of playing back content from any USB storage device plugged into your PS4, but also viewing and streaming media that's being shared from your PC.
Step 1: Downloading and Setting up Universal Media Server
In order for your PS4 to be able to see your films, TV shows and more from your PC, we first have to set up the PC so that it acts as a media server. The simplest way of doing this is through a small program called Universal Media Server (UMS), which serves your files across your home network and allows the PS4 to easily see them and play them back on your TV.
To get started, you'll need to make sure you have an up-to-date version of Java installed on your PC, as this is required for UMS to work. You may already have Java on your computer, but if not, then go to java.com and download it from there directly. In the interests of security, you should never download Java from unknown websites.
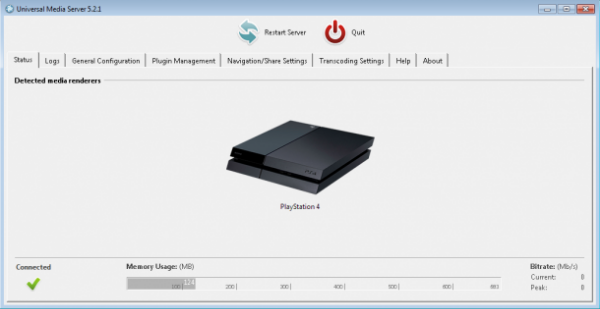
Next you need to download and install the Windows version Universal Media Server. Simply visit their website and click the Windows logo and the file will start downloading. The program is free to use and works with pretty much every computer, file type and games console. Once it's installed, you should be looking at the UMS main panel:
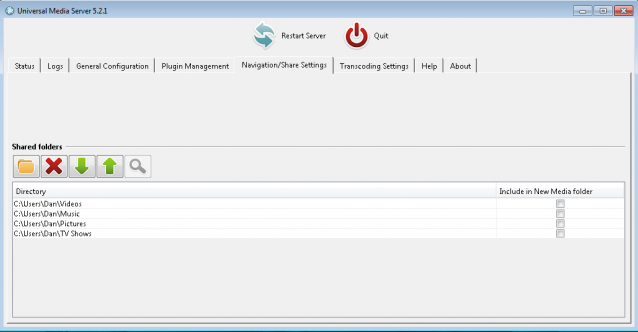
All we need to do now is tell Universal Media Server where to find your files. By default, it will allow access to All Drives, but this can get confusing – so instead, it's better just to add only the folders you want to share:
- Click on the Navigation/Share Settings tab at the top of the UMS main panel.
- Under the Shared Folders section, highlight all drives and press the red x to remove this.
- Now press the Folder icon to choose a folder.
- Find the folder containing your media files and press open.
- That folder will now be added to the shared folders list.
- You can add multiple folders this way, so you it's simple to organise your media into Movies, TV Shows, Pictures, Music, etc.
- Once you've added your folders, you now just need to press the Restart Server button at the top to finish off the setup.
And that's it: your PC is now all set up, and is sharing your folders across your home network. Next we'll see how you can access this on your PS4 with the new Media Player app.
Step 2: Streaming your media with the new PS4 Media Player app
Well, it's taken a little while, but we finally have a plain and simple media player app for the PlayStation 4! The app is simple to use, as it simply shows you available media which you then click to start playing.
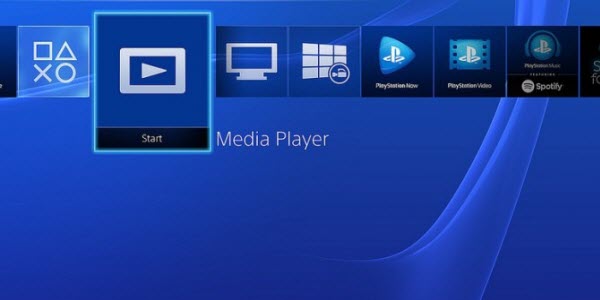
You should see the icon for Media Player on your menubar. Press it – and, if you've not done so already, download it from the PlayStation Store. Once it has downloaded, simply open up the app, and you will now be looking at the media being shared from your PC.
At first you'll be given the three main sections: Recently Played, Favourites and your Universal Media Server. The server will be at the bottom of the list, and may show up as your computer's name – 'Daniel's PC' for example.
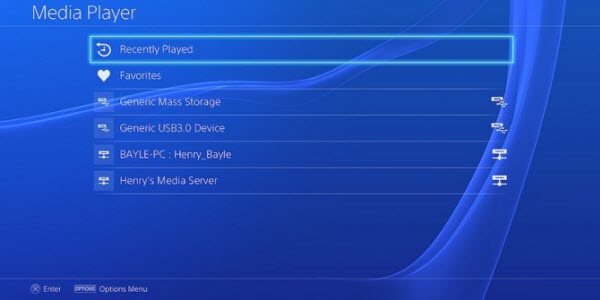
From here, the process is very straighforward. Simply click on your media server, open up one of the folders that we added to UMS earlier then click the file you want to play. At this point your video or music will start playing.
And that's it! You're now streaming media from your PC to PS4 using UMS and the new Media Player app.
I've placed the list of support codecs for the PS4 Media Player app below – however, Universal Media Server will normally try to transcode or 'mux' your files on the fly as they're being streamed, so hopefully all of your files should work without issue.
Note: Here you'll find the list of file types and codecs supported by the PS4 Media Player app at the time of publication. Be aware that, while every effort has been made to ensure the accuracy of this piece, compatibility could change depending on future patches or software updates.
Method 3: Using Plex Media Sever
Plex Media Server is a much more media centre-esque way of streaming your media, as it provides a fantastic-looking interface that shows you titles, cast lists, episode descriptions and more. Basically, it's like navigating Netflix – but everything is stored on your home PC.
Setting up Plex is quite a bit more complex than Universal Media Server, though the visual effects are worth it – and if you want a true media centre experience then Plex is definitely the way to go.
When it first launched on PS4 and Xbox One you had to be a paying Plex subscriber in order to use the app. However, as of Decemeber, you can now use the Plex app for free! So with that in mind I'd definitely recommend giving this method a go!
Step 1: Install and setup Plex Media Server on your PC
Setting up Plex should be quite straightforward, as we just need to follow the steps it gives us. To get started, we need to download the application itself – so head on over to the Plex website and download the Plex Media Server application to your computer. Once this is downloaded, open the file to begin the set up.
- The first screen simply asks us to install, so press the Install button to begin.
- Confirm the User Account Control box, if it pops up, by pressing either Yes or Continue.
- Give the installation about a minute or so to proceed.
- After the installation has been completed it will present a confirmation, so press Launch at this point to begin setting it up.
You should now be taken to your web browser to begin the Plex setup. If it doesn't open automatically, look in your task tray in the bottom corner of your PC (where the time, date, Wi-Fi and other icons are found) and double click the Plex logo. Once the browser is open, it will now begin to take you through the process of adding your media files to your Plex Media Server.
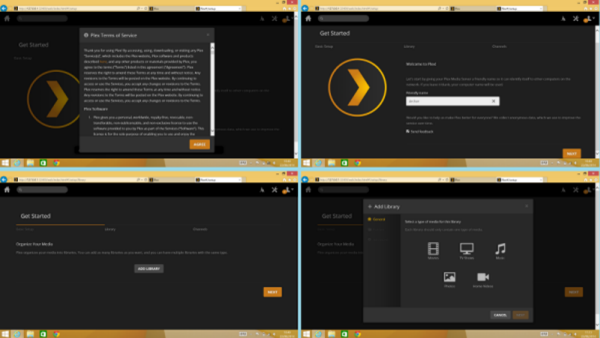
First up, you need to agree to the Plex Terms of Service, so hit the Agree button to continue.
- Now pop in a name for your server, then hit Next to continue.
- We will now add some 'libraries' to your Plex Media Server. Libraries are collections of music, movies, TV shows, photos or home videos. Press Add library to begin.
- Choose the library type you want to add from the choice of five types and press Next.
- Give your new library a name and press Next.
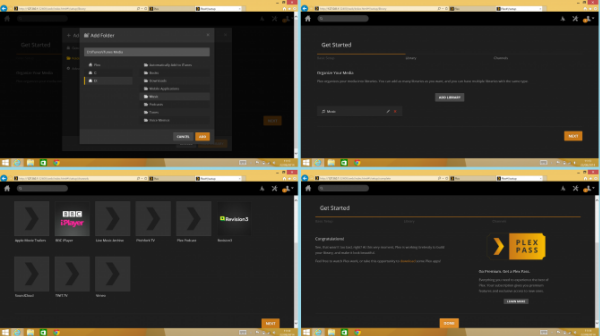
- Press add folder and select the folder where your chosen media is stored, then press Add.
- You can repeat these steps for each of the libraries you want to add (music, TV shows and so on).
- Once you have picked some libraries, click Next.
- You now able to add some Plex 'Channels', like BBC iPlayer, or skip this for now by pressing Next.
- Your Plex setup should now be complete, so press Done to finish the process.
- Now Plex needs some time to analyse your library and find all the necessary data to fill it. The amount of time required will depend on how much media you've added to your libraries. Once the analysis is complete, we'll explain how to add a Plex account, making things a bit easier to access from your PlayStation 4.
Step 2. Using the Plex App
As of December, you can use the Plex app for free - you no longer need to have a paid Plex subscription to use the app.
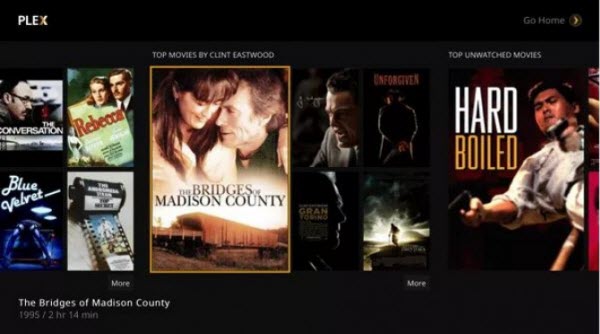
The Plex app is certainly the most elegant way to enjoy your media on the PlayStation 4, as it presents your video library with the great interface Plex is famous for.
You can browse your TV shows and movies, and Plex will show you all the information and metadata it can find about them: episode description, release year, actors and so on. It will also show you the covers for the shows or movies, a feature that adds even more to the seamless integration.
The Plex App can be downloaded from the Store on your PS4. Once downloaded, open the app and you're offered the option to pair or sign in. Once you are signed in, you should be able to see your entire library and access it all through the PS4.
Part 2. Stream Any Video to PS4 After Converting to Supported Format
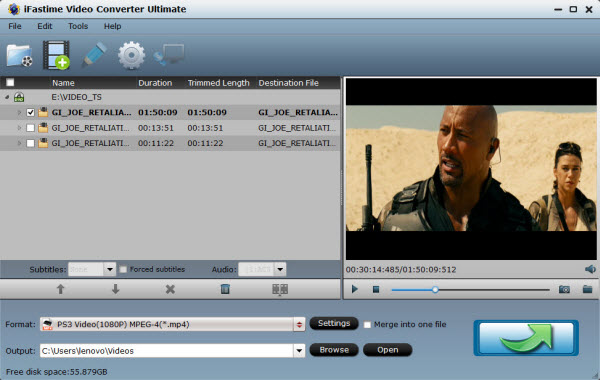
Before you play videos on PS4, check whether the video is in line with the PS4 compatible video format. Otherwise, convert it. By the way, if your 4K UHD video file size are enormous, you can compress 4K UHD video of MP4, AVI, MOV, etc. to PS4 to save space.
Here you need help from iFastime Video Converter Ultimate which is a phenomenal video conversion tool to convert videos like AVI, MKV, MP4, AVI, FLV, MOV, H.265 and a lot of other weird formats/codecs to PS4 readable format with perfect output quality and high conversion speed for Windows users. In addition, the program has outputs with optimized settings for your game console Xbox 360, PSP, Wii, PS Vita, which means you just need to select the device as the output format and you can convert virtually any video file to fit your PS4 without needing to know any codec, resolution, bit rate, etc in advance.
More Tips: HAVE A DIFFERENT CONSOLE?
Don't have a PlayStation 4? Or do you have another console you want to get set up and running? Then we've got you covered with guides for each major device – just click the appropriate link for your particular setup:
Stream from PC/Mac to Xbox 360/One | Stream from PC/Mac to Chromecast 2 | Stream from PC/Mac to Roku 4
Related Articles:
- Can't Play DVD on PS4, Solved!
- How to Play MP4 on PlayStation 4?
- How to watch Christmas Blu-ray discs on an PS4
- Xbox One vs. PlayStation 4: Which is Your Dish?
- Play YouTube Videos on PS3, PS4, Wii, PSP, Xbox Game Consoles
Have more questions about how to stream and play Videos on Your PS4 from PC/Mac, please feel free to contact us>>
One thought on “Stream and Play Videos on Your PS4 from PC/Mac”
Leave a Reply
You must be logged in to post a comment.
Categories
Ultimate media solution to convert all SD, HD, 2K, 4K videos to play, edit, share on Windows 10.
Price: $45.95
I learn several excellent stuff here. Keep doing such a good work.